.svg)
Step 1: Open the Location Menu
Before scanning make sure the storage unit follows the Inventory Basics guidelines.
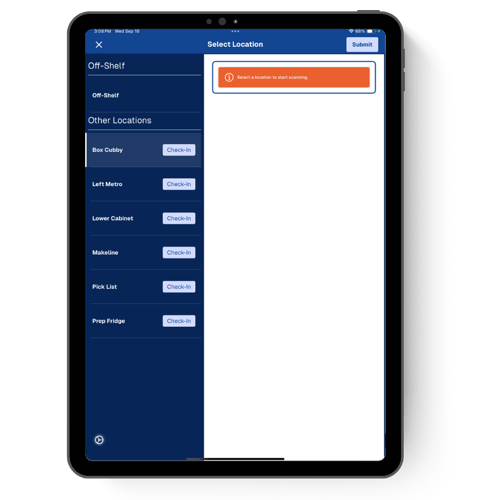
Tap on the desired job or Start Scanning button to open Location Menu.
1. Select Check In on a location and follow the on-screen prompts for check-in method.
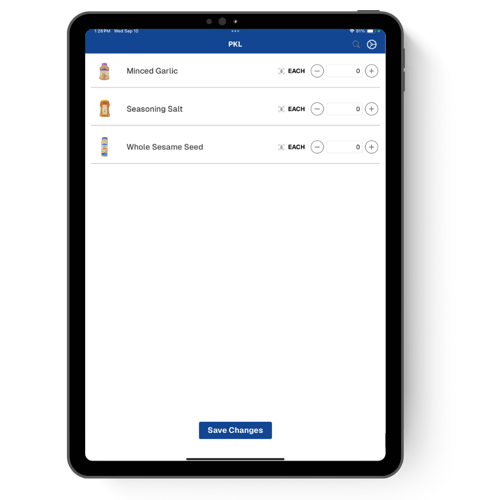
2. If the location is a Pick List, tap Check-in then enter quantities for all listed items.
-1-1.png?width=155&height=81&name=Untitled%20design%20(4)-1-1.png) Troubleshooting Tip: Select the wrong location? Swipe the Done slider at the bottom of the screen then tap the Location Tracker icon to exit. Don’t forget to come back and finish the location!
Troubleshooting Tip: Select the wrong location? Swipe the Done slider at the bottom of the screen then tap the Location Tracker icon to exit. Don’t forget to come back and finish the location!
Step 2: Follow the on-screen prompt
- Hold the device steady and parallel to the shelf.
- Focus the viewfinder on the QR Code at a close distance – get within 6 inches of the QR Code.
- A green label will appear when check-in is successful.
Troubleshooting Tip: Make sure the NomadGo logo on your QR Code label is right-side up. If you can't read it, neither can the device